Tuesday, March 13, 2012

Cloth Diapering in the 21st century

Ok. Many of you would probably cringe at the mention of cloth diapering. I find that many people don't quite understand how far cloth diapering has come since your Momma or Grandma diapered their children. So let me see if I can spell out how cloth diapering works for our family.

Types of Diapers
There are many types of diapers out there now-a-days. For me, I started with a pocket diaper to see if I could even handle cloth diapering. Once I knew I could handle the idea, I switched to prefolds...which for me is the way to go. I will write another post about how I go about cloth diapering. For now...I need to give you a history lesson.
Prefolds
Many of you probably think about cloth diapering with the idea of prefolds. This old school diaper is usually made of cotton.  It has a thick layer in the middle and 2 thinner side layers. Sometimes you'll see things like 4X8X4. This tells you that there are 4 layers on the sides and 8 in the middle. There are many different types of prefolds. First there are bleached and unbleached, which is exactly what it sounds like...the bleached ones have been bleached white where the unbleached ones are a little creamy looking. There are also Chinese prefolds or Indian prefolds. I have half and half of each. The Chinese prefolds seem to come in larger sizes. I like the GMD (Green Mountain Diaper) called Cloth-eez.  They come in great sizes and are trimmed in a color to easily tell which size you are using. A word of caution too...if you are looking at Gerber cloth diapers in Wal-Mart or Target, these are NOT prefolds.  These are meant to be used as burp cloths, not as prefold diapers. They are made of birdseye or gauze and are not absorbent enough. They will leak in 5 sec. The key is to find a diaper that are 4X8X4 (unless it is a preemie size).

Prefolds require covers.  This is where the idea of your Momma or Grandma cloth diapering totally changes! There are MANY types of cloth diaper covers out there. Green Mountain Diaper has a great page discussing all kinds of covers here. I am only going to touch on what I know. Many covers are made of a material called PUL. It stands for polyurethane laminate. This is the layer that makes the diaper cover waterproof.  It is not like those plastic pants that have been used in the past that leak all over. Many of the covers have the PUL layer inside so they can we wiped clean and used again. This is my preference. Any cover that does not have this slick layer inside has to be washed after 1 use, meaning 1 cover per prefold.  My go-to covers are the Bummis Super Brite, and Thirsties diaper covers . These covers have a gusset around the leg that prevents any leaking. Some of the Thirsties come in snap closures at the top. I have found that velcro is the way to go. They seem to last longer. The Bummis Super Brite comes in sizes NB-XL. The Thirsties diaper covers come in sizes XS-XL.  Prefolds sound hard because you have to fold them, but they are actually quite simple. Here is a site that can help you learn to fold them. Also, with a cover there is no need for those large safety pins from the past.  You can still use them or a Snappi to hold the prefold if you think you need it. A snappi is much safer than those large safety pins that can really poke your child.
Bummis Super Brite
Close-up of the BSB leg protection
Thirstier diaper cover with velcro closure


PUL material inside the covers.

prefold with cover on baby

prefold folded inside a cover
snappi on a prefold


Pocket Diaper
This is a great diaper for those of you who need an easy cloth diaper that goes on just as fast as a regular disposable. As I stated above, I started with these. Basically this diaper is like a diaper cover shown above only it has fleece inside it that goes against baby's skin. The micro fleece actually is a pocket where you put a thick insert to absorb the wetness. I started with some Bum Genius 4.0. These were very easy to use.  A dad or babysitter could definitely use these with no problem. I found that there were a couple of negatives though: very pricey, hard to clean/wash, can only be used once, and very bulky on small babies. I have not tried other pocket diapers that are sized(meaning they have them for each size NB-XL) and I am sure many people enjoy the ease of using these diapers. I did keep a couple of my Bum Genius for times when I need an easy solution.
Bum Genius 4.0


As you can see an insert or prefold is inserted into the pocket.

AIO (All in One) Diapers
AIO diapers are very similar to a pocket diaper.  The only difference is that the insert is sewen into the diaper and can not be removed. Here is a Youtube video about the difference between an AIO and a pocket diaper. I have no experience with these, but since I am not a pocket diaper fan, I doubt I would enjoy these either.

Fitted Diapers
Basically fitted diapers combine the idea of a AIO diaper and a prefold/cover combination.  Basically this diaper is made of a fleece material and snaps for easy closure. There is no folding or pinning. Just snap to close.  Then, you take a cover, like the Bummis Super Brite and put it over top to prevent the leaking. Here is a YouTube video about a very popular brand called Kissaluvs. I do not have any experience with this diaper, but it sounds like this would be a great way to go too!
Kissaluv fitted diaper

Now that I have explained what kinds of diapers are out there...I'd like to tell you how it all works. Keep reading my next post Cloth Diapering for My Family.

Monday, March 12, 2012

Making Nursing Pads

Sorry Men out there...just disregard this post :)

I found this great site about making homemade nursing pads. I thought I'd try it out because they looked so easy to make and I have a lot of scrap fabric that I could use to make them.

Supplies
-fleece (1 circle per pad)
-flannel (2-3 circles per pad)
-bowl 4.5" to 5.5" in diameter


Instructions
1. Select your bowl size.
The site suggested a bowl at 4.5" in diameter. Most nursing pads are 5" in diameter that you buy. I think if you are an A-C, a 4.5" bowl would be sufficient.  If you are larger, I suggest a 5.5" bowl. I started with a 4.5" and found that I think I will be more comfortable with my larger sized pads.


2. Trace the bowl onto your flannel piece.
You can use an old flannel sheet or a receiving blanket. I used 2 receiving blankets so the outside looked nice. Then, I used some scrap material I had with Looney Tunes on it for the insides. You'll notice that I did make some Looney Tune ones because I ran out of blankets :)

The site suggested that you fold your material in half so you have only half of them to cut out. I tried that at first and some of them did get off kilter. For me it was a little more work, but made them look nicer if I just traced each individual one out. The fleece was probably came out the worst. I wasted several pieces.

On the site it suggests making some day pads with only 2 flannel pieces and night pads with 3 flannel pieces per pad.  With my smaller pads I made day and night, but afterwards I figured I would just make all of them 3 thickness with the larger pads.


3. Trace the bowl onto your fleece.
You will only need 1 piece of fleece per pad. I used some scrap material leftover from some fleece blankets.


4. Cut out your fleece and flannel pieces.


5. Layer the pad with 3 flannel pieces and 1 piece of fleece.
The flannel piece will go towards your skin and the fleece will face out away from your body.


6. Sew or surge the pads together.
Position the pad at the edge of your foot to decrease the amount you will cut off later. Use a zig-zag stitch. Make sure to overlap the ends of the stitches to secure them.
I started trying to surge them...and boy is that the way to go...only I broke my needle :( so I ended up sewing them. I suggest sewing them with the fleece facing up.  The fleece tended to slip more facing the sewing machine.


7. Trim the edges.
Cut close to your stitching. AND YOUR DONE!


I'll update this post of how well these work when I get a chance to use them! I hope you enjoy this simple project.

Basement Project---We have a ceiling!

Ben continues to work on our basement project.
Last week Ben put up all the insullation.
It was a yucky mess he said.
I was not aloud to go down because of the fibers.
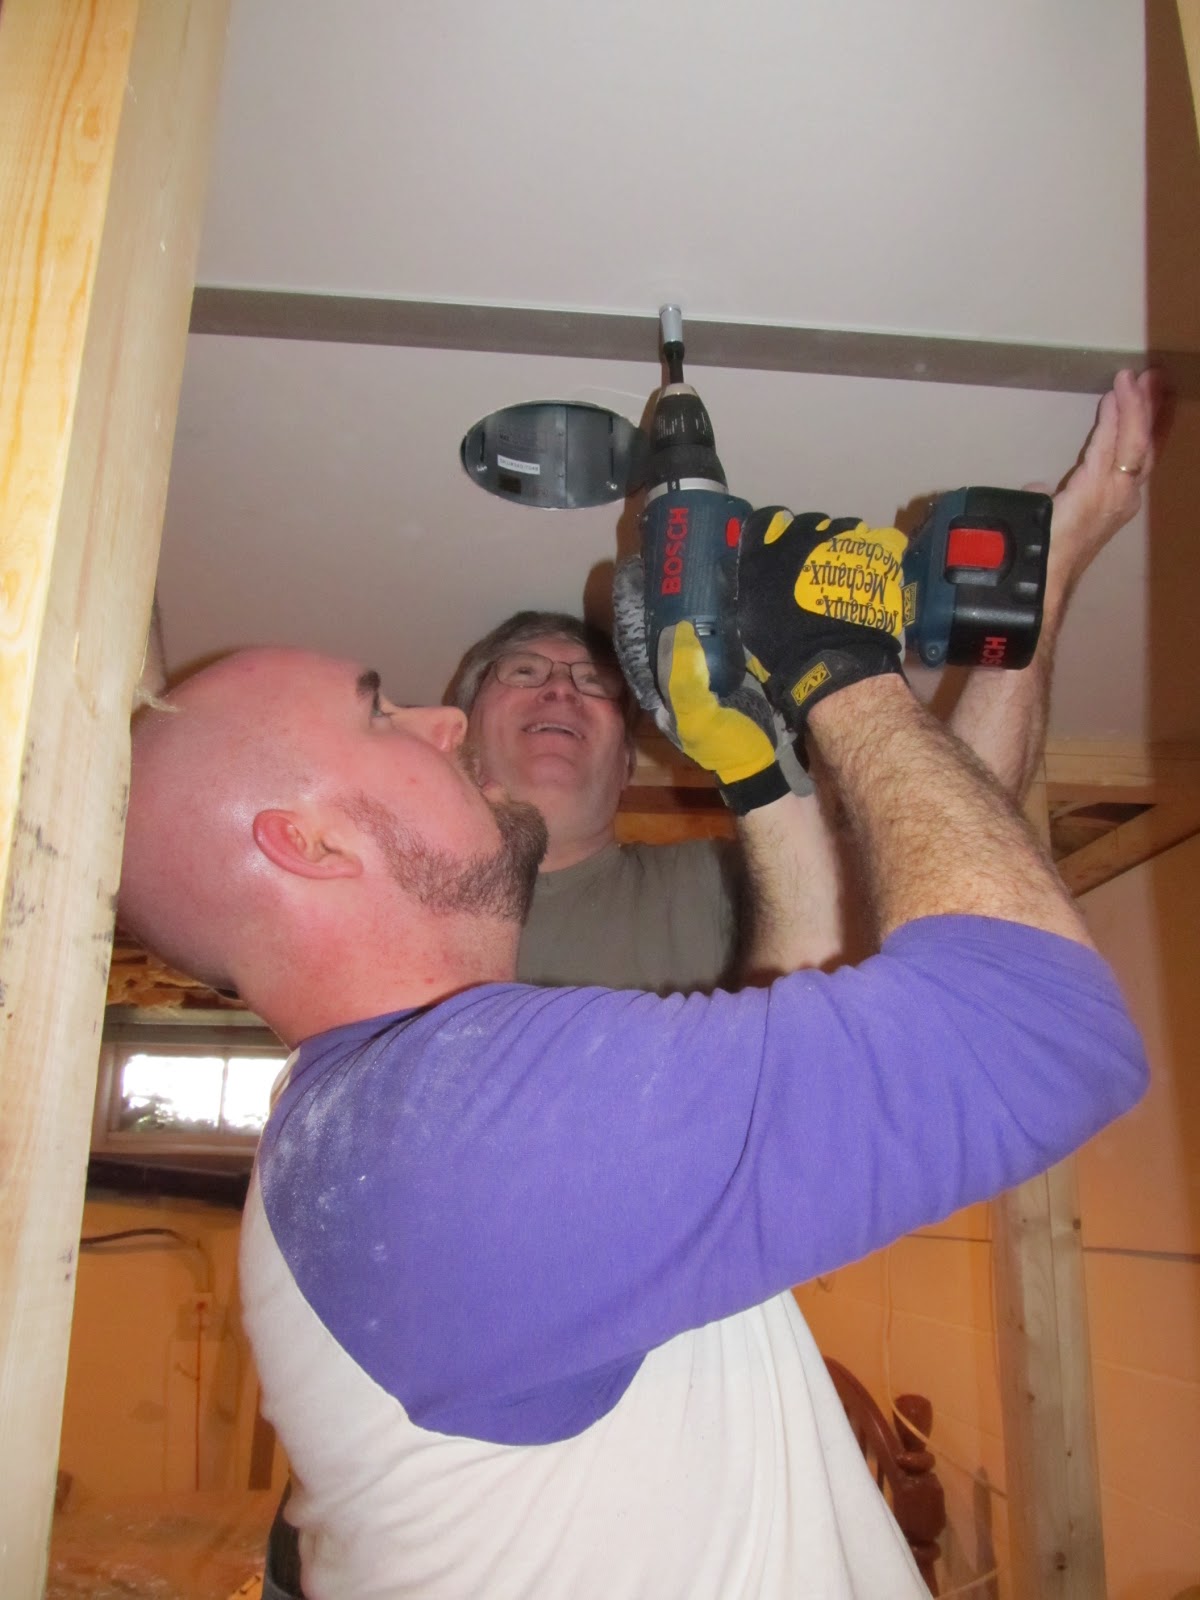
Ben with our neighbor Ken (back) and friend Craig (front)
cutting the first sheet of drywall for the closet.

Ken and Ben putting up the closet ceiling piece. The first piece was the trickiest!


The light hole fits...now to screw it in!

Making progress!!


The bed makes a great step stool!

14 hours later the bedroom ceiling is up and most of the laundry side is done. Today Ben put up the recessed lighting trim and a few smaller pieces of drywall up near the washer and dryer.  Next comes the dividing walls for the bedroom and the door. Hopefully Baby Buckeye will hold off yet so Daddy can get that done before he comes.

Friday, March 9, 2012

When is Baby Buckeye Coming?

When is Baby Buckeye coming?

This is the question ringing in our ears!  As many of you know I have been having Braxton Hicks contractions (BHc) since 22 weeks. He is such a mover too. This pregnancy has definitely been entertaining in that way!

Many of you know that a few weeks ago I went in to the dr. and they ordered an ultrasound to check him because his fetal movement had drastically changed. No caffeine or sugar was going to get him moving either :) He was already measuring 6 lbs. 15 oz. which is about 2 weeks bigger than his age.

This past week was my 36 week check-up. The night before my appt...about 1AM Wednesday morning... I began having a lot of contractions. Some of them were very strong lasting about 3 min., while others were only 30 sec. and barely noticeable. I had about 12 in an hour and a half. They never got in a rhythm and I just tried to go to sleep.  I awoke to several strong ones, but again they never got in a rhythm. By the time I went to the dr. at 11AM, I had had about 30 contractions. My dr. checked me and I was measuring 2cm dilated and 75% effaced (at 36wk5d). She told me that I was not in real labor, but that I would probably not see 40 weeks. The BHc continued into the evening and the next day.

Last night I experienced a 2 hour cluster of BHc, with 2 very STRONG ones that lasted about 40 min. together. With how strong they were, my suspicion is that this has caused some more dilation. I'm officially 37 weeks today and wondering if we will see Baby Buckeye soon!?!?!?!? 

We'll keep you posted!

Tuesday, February 21, 2012

The Basement Project Continues

Ben and Dan spent all of Fri-Mon working on the basement project.  They worked so hard!!  We are so excited about how much work they accomplished in such a short amount of time. They spent two of the nights working until 3 AM and then 5AM one night.

Here is all they accomplished:
-moved water lines so that they would be up in the joists
-moved a gas line so that there would be more clearance when you come down the steps
-moved the shower waste line up into the joists so that it no longer sticks down into the room
-finished moving duct work that was connected to a huge vent in the new doorway
-framed the walls to the closet and doorway to divide the rooms
-ran electrical to new lights and outlets
-made an outlet upstairs behind our baker's rack
-made a light switch to the back patio by the sliding glass door
-made an outlet and switch on the other side of the basement near my work table
-replaced the line into the washer

some of the big materials :)

gas line that used to stick down and try to hit you on the head as you came down the stairs
now it is up in the joists

all 3 ducts were moved and rerouted to get rid of this nasty eye sore

the large duct to the right was made into the vent for the bedroom
the top duct was rerouted from the furnace

frame for the closet door side
What a team!!!

all 3 walls framed and getting put into place

Hey...it's a closet :)

After picture of the shower drain pipe that was rerouted into the ceiling joists.
red water line was also put in
bottom water line was capped b/c it went to nowhere land :)

another picture of the shower drain rerouted
eventually the big black drain will also be moved
so that the egress window can go here in the corner

finishing the frame for the doorway


the finished laundry side with 2 recessed lights...yay for new lighting!

new switches and outlets

nothing coming down from the ceiling like pipes or duct work
some awesome recessed lighting on a dimmer switch

awesome view from the bedroom :)
Obviously we have some more work to do!  Ceiling and new walls need their insullation and drywall up...but what a tremendous job they did!  Looking at the new room makes me want to consider moving down there when the kids are old enough to be upstairs by themselves. The drain pipe and egress window project will also be upcoming making this a 3rd bedroom in our home! YAY!

(Anyone needing some work done in the Akron, Ohio area can always call Varner Quality Services, Dan's handyman and lawn services company. Really he is a jack of all trades!!! Just ask me and I can give you his number! Without his knowledge and expertise this project could have never happened. Thanks Dan!!!!)

Monday, February 20, 2012

Day at the Dr's Office

Well...I spent the day at the dr's office. I had an appt. scheduled on Thursday but I had been noticing a significant decrease in movement for at least 4 days.  The dr ordered an ultrasound and monitoring the heartbeat for about 20-30 min. to make sure the baby was doing ok. They basically wanted to make sure my fluid level was ok, the baby was moving and showing some breathing techniques and that he wasn't stressed in any way. Everything turned out fine.  The nice thing was being able to see such a detailed baby face on the screen.  He is so adorable and looks a lot like Leona did :)  The only bad thing is that currently he is already 6 lbs. 15 oz. based on the ultrasound. She said this is often larger than the actual size, but still...we have 5.5 weeks to go!!! YIKES!

Here are some pictures:
Don't be fooled...that is a foot on the right :)

Love those tiny lips and chubby cheeks!


Baby has long hair already :)

Self-explanitory!
Well...needless to say I am really exhausted.  With the basement remodel and my own physical energy...I'm bushed.  Pray for my strength!

Here are some videos too:
As you can see he had no problem moving during the ultrasound :)